This is a complete guide about the differences between the Absolute Extruder and Relative Extruder within 3D printing. This time, however, we will focus on the compounding details of extrusion and stirring, the quality of the printout, and the details of the extruder. The relative extrusion and absolute extrusion modes can be compared, and the differences and advantages in their use are more significant when using a layer change script to improve the quality of the printed product. Furthermore, G-code routines, notably M82 and M83 commands, will be explained while monitoring the role of parameters set by the slicer on modes of extrusions. Kindly note to pay attention to the slit answering method as it explains the usage of the specific g codes and translation of the extrusion modes. So, what are you waiting for? Come along as we better understand extrusion and, more specifically, the Absolute Extruder and Relative Extruder in 3D printing.
What is Extrusion in 3D Printing?
The set of words or phrases in this article are 3D printing, 3D printer, extrusion, filaments, and volumetric settings on an axis. If you’re interested in fashion, you probably know that new trends appear daily. If you’re a student interested in 3D printing and filaments, we have great news: this area has infinite expectations. With the advances in technology for 3D printing, new products are launched, and marketing growth is shifted from one segment of influence to another, enticing and engaging more and more customers in the creation process. This guide addresses up-to-date information for filaments and outlines recent trends in the world of 3D printing so you do not miss anything!
So, if you’re interested in these trends, follow this post, as we will keep you updated with the latest 3D extrusion overlaps and trends. If you are passionate, just imagine how fascinating it would be to walk into a room filled with embossed decor pieces, color-matched decor, and luxe textiles seamlessly harmonizing as an exquisite masterpiece! That is what one has the chance to create with ease through emerging 3D technologies. Considerably less effort, time, and resources consuming – this world of fashion is yet to come!
In this modern world, we expect our products to be durable, extremely affordable, and tri-dimensional in design, with multiple utilization possibilities. Welcome to the world of 3D filaments and extrusion! The best part? Additive manufacturing is in its infancy, and there’s a wide scope for exploitation.
Grasping the principle of 3D printing through extrusion and its relationships with print quality aids understanding in making choices related to printer settings and the overall experience of using the 3D printer.
How does extrusion affect print quality?
The quality of 3D-printed objects is highly dependent on extrusion, which is a process of melting the filament and applying it to the print as a layer of heat or pressure. A good filament extrusion achieves accurate measurements and proportions on both surfaces and bonding of the parts of the print.
Factors that can be attributed to extrusion’s effects on the quality of print include:
- Extrusion Rate: There has to be control over the speed of the filament as it comes out during the extrusion process. Otherwise, if uncontrolled, under extrusion can weaken a print to the point of breaking or having holes, while excessive extrusion causes the print to thaw out grains and become quite grotesque.
- Layer Adhesion: The layer adhesion of the print becomes exceptional because the bond between them helps to hold the print together tightly.
- Surface Finish: Precise extrusion is required to keep the particles together that will be used later for the projected surface, as it influences the printable object’s surface detail and excellence.
To achieve an optimal extrusion that enhances its quality, you can make filament diameter, nozzle temperature, and multiplier changes through the custom G code that you see fit. Calibration prints and observing the active layers also help orient to the problem and devise a solution.
Through understanding how extrusion affects print quality, users of 3D printers will be able to set their printer configurations appropriately, and thus, any print will have a better finishing, and the experience of 3D printing will be more satisfying.”
Understanding the extruder mechanism
The extruder mechanism accounts for one of the most important domains of a 3D printer as it pushes the filament out of the nozzle. It allows control over the amount of material deposited during the process with complete focus, especially when accuracy relies on single-precision float values. The extruder is more complicated and consists of three major components: the motor, a drive gear, and a hot-end assembly. The drive gear, being rotated by the engine, pushes the filament towards the hot end through gripping action. The filament is then heated above its melting temperature inside the hot end and flows through the nozzle and onto the print bed or previous layers with close to no resistance.
The extruder mechanism is also the primary reason for the quality and accuracy of the printed object. Therefore, it becomes critical to calibrate and adjust the timing of different settings, such as the filament’s diameter, the nozzle’s temperature, and the extrusion regression settings. Doing part calibration prints and monitoring the section of the first few layers is vital to prevent problems connected to extrusion.
Knowledge about how an extruder mechanism affects print quality would allow 3D printer operators to be more sensible and accurate when altering the settings on their printers, resulting in more successful prints and an overall enhanced 3D printing experience.
The role of filament in extrusion
Filament is one of the most important components of the 3D printing process and is critical to extrusion. It is a thermoplastic material that acts as a feedstock from which layer by layer, 3D objects are formed. Understanding filament characteristics and properties is vital to obtaining the best print results and having an easy 3D printing experience.
When choosing filament, the user should look at several aspects of the filament, including material type, material diameter, and filament quality. A good example is PLA (Polylactic Acid) versus ABS (Acrylonitrile Butadiene Styrene), each with different filament material characteristics and performance capabilities. Strength, flexibility, temperature resistance, and printing ease are some features determined by the filament material used.
Moreover, the diameter of the filament is important in maintaining consistent extrusion and ensuring print accuracy. Most filaments have a diameter between 1.75mm and 3mm, so the printers need to be properly calibrated before extrusion.
One primary factor in successful and repeatable extrusion is high-quality filament. Substandard filaments, on the other hand, may contain impurities, have a very large diameter, or have a poor melting point. Such defects may interfere with extrusion or cause layer adhesion failure. Hence, it is recommended that well-known companies supply good-quality filament.
As a consequence, a thorough comprehension of the role of filament in the extrusion process enables 3D printer users to select, manipulate, and handle filament appropriately, which can ultimately lead to better print results and a more enjoyable 3D printing experience.
Exploring Relative Extrusion Mode

What is relative extrusion, and how does it work?
Relative extrusion is a mode of 3-D printing whereby the movements of the extruder are determined by relative coordinates instead of absolute system coordinates. In this mode, incremental movement from the last position is considered rather than absolute positions towards the origin.
When printing using relative extrusion mode, constantly monitoring the current position allows the printer to plan for the next movement position. This is an added advantage when the printing of a model is to be done, as it contains many intricate details that require precise and accurate extrusions to be controlled.
Also, feeding the relative coordinates to the printer offsets the oozing, stringing, and even layer adhesion irregularities, enhancing the prints’ aesthetic value. This is because the rate and flow of the filament are controlled much better and consistently, resulting in higher-quality prints.
Installing the 3D printer for relative extrusion mode of operation includes changing the printer’s settings and the software, which also depends on the model of the printer. It would also be essential to comprehend the workings of relative extrusion and its advantages to 3D printer users. This will enable him or her to select, utilize, and handle filament properly for better print quality and overall 3D printing experience.
Configuring your printer for relative extrusion mode
Below, we will explain how to configure your 3D printer to match your requirements, especially if you want to print in a relative extrusion mode. Please be aware that the setting sequence could vary depending on the printer model and software, such as the usage of custom G-code. Even though this guide gives some basic instructions, it is still best practice to check your printer’s documentation or manufacturer’s instructions for the most current details.
To configure your printer to work in relative extrusion mode, the following steps are suggested:
- Software Settings: Open the 3D printer software on your computer and navigate to the settings section. Look for settings regarding the extrusion mode or even the filament settings. If such an option is available, turn on the relative extrusion mode option.
- Filament Diameter: Double-check whether your software’s filament diameter setting is properly set. This is vital information for achieving proper extrusion calculations.
- E-Steps Calibration: E-steps control the amount of filament extruded for each movement, which defines the overall extrusion. Check your printer’s documentation or use a search engine to find out how to calibrate the E-steps on your specific printer model.
- Flow Rate Calibration: When using a G1 command for the first time, performing a flow rate or extrusion multiplier calibration is wise to specify the amount of filament to be extruded more precisely. This step ensures the filament is uniformly and precisely laid down in all commands.
In addition, setting the machine to relative extrusion mode will enable you to use the advantages of this ‘improved filament control and surgery cutting extrusion.’ Don’t forget that the guidelines provided by the printer manufacturer should always be adhered to to achieve the best printing results.
Common issues and error messages in relative mode
Having understood how to use relative extrusion mode reliably, I appreciate that there are some common problems and error messages you will encounter while working with this mode. One common problem is the uneven flow of filament, which results in poor and uneven prints. To avoid that, check if your printer’s extruder is well-calibrated to adjust the amount of filament in the feed. Another issue you may encounter is the problem concerning the feeder supply; there could be too much or too little supply, resulting in poor prints or worse. This can be solved by modifying the extrusion multiplier implemented in the slicer software or ensuring that the nozzle does not have clogs or other impediments. Please follow your printer-specific instructions and accompanying documentation to solve such issues correctly and get the best out of relative extrusion mode.
Understanding Absolute Extrusion Mode
How to use absolute extrusion with your printer
Employing absolute extrusion mode with your 3D printer allows you to adjust the amount of filament extruded to your liking finely. To implement absolute extrusion, observe the following steps:
- Adjust settings on your Slicer software: Start your slicer software and go to printer settings. Locate the setting to switch to absolute extrusion mode and enable it to allow your printer to treat the extrusion commands as absolute.
- Working on the Model: After the usual process of setting the print parameters, the thickness of layers, percent density, how fast it works, and so on, load the 3D model and get ready to export it on the slicer software.
- Export the G_CODE: After the model has been prepared, cut it using the slicer software and export it. The G_CODE included in this export has all the info one needs to print and includes an install command.
- Transferring the G_CODE: Use a usb or SD card to move the generated G_CODE into your 3D printer. Ensure you have the printer set up correctly; otherwise, there will be no instructions for the printer.
- Loading the G_CODE and printing: The G_CODE is then put into the printer, and the print job is started. Once the printer is ready and starts receiving the commands, the 3D printer can determine exactly how many commands to execute and the best directions to deploy the filament.
Employing absolute extrusion mode guarantees a uniform and precise extrusion throughout every single layer of your 3D prints, thus reducing the chances of under-extrusion and over-extrusion conditions. For further help regarding the effective use of absolute extrusion, please consult your printer’s instructions and documents.
Remember that you should always consider your printer’s parameters and functions, as well as its calibration, in order to obtain the best possible results.
Benefits of absolute mode over relative mode
Selecting absolute extrusion mode in 3D printing has several important advantages:
- Accurate and Stable Extrusion: First and foremost, one can be sure that their absolute prints will never suffer from issues of under or over-extrusion on any part of the print as the exact volume of filament required to be deposited is provided in the slicing software for every single printing point in each layer.
- Best Possible Print Output: Since every extrusion is accurate and done at the correct timing, prints produced in the absolute mode have a better surface finish and dimensional accuracy than prints produced in other modes. This is more so the case when it comes to printing small detailed or very complex models that need high tolerance and precision in reference to their absolute dimensions.
- Smooth Changeover between Filaments: There are a few cases whereby an absolute mode works best and it tends to be used when doing selective additions of filaments. Absolutely, always ensures the machine’s smooth operation while using multiple colors or other materials, increasing its efficiency and ultimately leading to a better print outcome since, as the extruder is aware of the precise amount required, it allows the installer to effortlessly switch during the job.
- Increased Multi-print Capability: If a user has to use multiple parts or print the same thing several times, switching to absolute mode makes that easy because parameters or commands within the extruder are not altered.
Also, this is a reminder that knowing the capabilities and functions of your 3D printer calibrated correctly is very important to make the most of the absolute mode of extrusion, especially when E-axis control is used. Always read your printer’s manual to ensure that you meet the requirements regarding the use of the absolute mode.
When to choose absolute extrusion?
3D printing has two modes that allow you to customize the fusion space – absolute and relative. Consider your printer’s specifications and your project’s requirements when attempting to choose. In certain scenarios, absolute extrusion is more favorable than relative and can be useful for specific tasks. Here are a few considerations that would help with the decision to use absolute extrusion:
- Multiple Prints: Absolute extrusion improves reproducibility considerably. Hence, when multiple prints or a print copy need to be manufactured at once, it becomes easy to do so. Absolute extrusion commands always make it possible to be more accurate with different prints.
- High-Resolution Prints: Absolute extrusion is suitable for intricate designs that require strict filament constraints in terms of volume per layer. It allows for accurate control of the position and volume of the filament with every layer, which is essential when creating structures with complicated geometry and detailed features.
- Processor Compatibility: Some software or slicers might cause compatibility issues with the absolute mode due to the required features. The program might also be configured not to work well with the absolute mode—it is better to check the recommended slicers or program documentation.
Let’s begin by recalling the fact that it is important to understand the characteristics and settings of your 3D printer, as well as make sure it is properly calibrated. Printing in obliterate mode has many advantages; however, there are some specific features of each 3D printer that must be taken into account, and in case of doubt, always check the manual provided by the manufacturer. However, when implementing design work and considering the capabilities of your particular printer, it is appropriate to decide when to apply absolute extrusion in 3D printing designs.
Comparing G-code Commands: M82 vs M83
What is the purpose of G-code in 3D printing?
G-code is the language of 3D printers—a code that instructs the printer. Movement, speed, and temperature, among other parameters, are defined. G-code depicts the movement sequences necessary for the printer to realize the design in a given 3D model. It provides the parameters necessary for the user to monitor the process, which guarantees the prints’ accuracy, precision, and reproducibility.
G-code commands are created by slicing software developed. The software receives a digital model, for example, of a head or other structure, which it turns into a tool path in accordance with various printers and printing parameters. Later, those commands, kept in plain text documents, are carried out by 3D printer images, as given.
Some commands, such as G1, and knowledge of G-code itself are particularly useful for improving print quality, adjusting print settings, and resolving faults that arise during printing. This makes it possible for users to handle 3D printing work more conveniently and easily, so satisfactory results may be obtained without much effort.
Using M82 and M83: A detailed guide
The M82 and M83 commands are fundamental as they define the axis of extrusion for the G-code commands on the printer. Thus, they facilitate the understanding of extrusion distances, which is critical in obtaining accurate and dependable prints. In this article, we take a closer look at the diverse functionalities of M82 and M83 and the factors contributing to making a choice between them and when to apply them.
How to Switch Between G-code Modes?
Regarding the transition between G-code modes, in particular absolute and relative extrusion modes, one needs to comprehend and consider the particular needs of his or her 3-D- printing projects. One can use any of the two modes, and they have their locational benefits and even considerations that affect the selection of that particular extruder, for example, the intensity of the print, properties of the material, or the accuracy of the print.
How to Decide Between Relative and Absolute Extrusion?

Factors Influencing the Choice of Extrusion Mode
In 3D printing, choosing between relative and absolute extrusion modes depends on several factors. It is recommended that these factors be considered before selecting the extrusion mode that is better suited to the specific needs of the 3D printing task at hand. The following are some important factors that one has to put into consideration:
- Print Complexity: The evolution of your print design can guide you on which mode to use in the extrusion process. In standard unified printing mechanisms, the relative extrusion mode is preferable in intricate designs where control over extrusion is key since it can be more variably controlled. On the other hand, if the design does not require precise control, absolute extrusion mode is preferred to obtain simpler designs.
- Material Characteristics: The properties of different materials are distinct, and so are their behaviors in the course of printing. For instance, when using filament, its viscosity/elasticity and flow characteristics should be considered. These parameters can influence the choice of extrusion mode since relative extrusion mode would be best used in cases most demanding an extremum.
- Desired Print Precision: Another dimension worth considering is the level of detail you want to incorporate into 3D-printed objects. Relative extrusion mode enables greater regulation of volumetric values, resulting in better detail of small features as far as parts are concerned. On the other hand, there is an absolute volumetric extrusion mode whereby the values are more or less maintained throughout the printing, and this, it is argued, is more applicable to larger prints that do not have so many details.
- Workflow Compatibility: Remember to consider dosing configuration when using a specific extrusion mode throughout your workflow, including the software configuration, slicer setting, and even post-processing. Finally, make sure that the proposed configuration or mode is compatible with your system so as to avoid problems during the printing activities.
Therefore, by evaluating such factors, you should be able to decide which extrusion mode will meet your 3D printing requirements. For best outcomes, be sure to modify and adjust your configurations according to the objectives of your distinct projects.
Impact of slicer settings on extrusion
In a particular 3D printing workflow, the slicer settings determine the extrusion parameters which in turn define the quality of printing done. To be more specific, extrusion is a slicer’s settings that determine the amount of filaments and the rate that the 3D printer pumps out during the printing. In this case, extrusion width, layer height, print speed, and flow rate are parameters of the G1 commands making them important in the slicing stage. Changing these basic settings will result in different impacts on the extrusion itself, such as the dimensional accuracy of the prints, surface treatment as well as print strength.
The following guidelines can be the primary steps in improving the extrusion settings in your slicer:
- Extrusion Width: Modifying the extrusion width could alter the quality of the completed print. By this definition, a wider extrusion width should automatically create stronger prints at the expense of fine detail. Varying the wide extrusion settings could help balance strength and detail.
- Layer Height: The printing layer height defines the distance between two consecutive lines in the print. As the height of the layer increases, so does the speed of the printing; however, it should be expected that surface quality could be compromised. As one goes lower on the height of the layer, detail will become enhanced, but the time for printing will increase. It is essential to find a good compromise between the speed of printing and surface quality.
- Print Speed: In 3D printing, adjusting print speed according to the model’s needs can affect the extrusion rate and, hence, the quality of the print. It is to be noted that increasing this speed might cause problems such as under-extrusion or poor adhesion. Reducing the speeds provides more accuracy of prints but can increase the duration of the print. The balancing act can vary from printer to printer and helps find the best quality for the material used.
- Flow Rate: The settings for flow rate, also referred to as an extrusion multiplier, determine how much filament will be extruded when a user commands the printer to do so. Attempting to modify flow rate should help one achieve finer control when extruding an object by considering the tolerance of the filament used. The flow rate needs to be tested using a test print to fine-tune it based on the desired quality of the final printed model.
One must remember that optimal slicer settings concerning extrusion depend mostly on trial and error geared towards achieving the desired result. It is suggested that more detailed recommendations or guidelines related to the filament and the printer be sought out in the user’s manual or documentation.
Case studies: Absolute or Relative?
In medicine, comparisons can be made either in absolute order of value or relative order of importance. The focus of the case study determines the use of either approach to measurement. Absolute measures are numerical values, while relative values are comparisons made with some measurements or a figure. Both approaches have pros and cons.
In case studies, absolute measures provide a definite and exact measure. Such an approach makes the analytical work very easy because such measurements are essential in terms of the goals that must be achieved. In absolute measures, the impacts or the boundaries of the impacts are clear indicators.
However, using relative values bases itself on comparisons. It exposes the relationship of the variables to other scenarios in dissimilar values and not in absolute terms. It emphasizes how the data is related to a reference measure, which is crucial in making conclusions on relative gains or losses of a certain effect. This is very important when there is a need to highlight the progression over time or various scenarios.
Both absolute and relative measures have advantages and can be helpful with specific targets and the specific dependent variables under investigation. The differences between the two are based on the research problem or the aim that the case study is to achieve.
Les valeurs absolues et relatives choisies pour la sélection doivent avoir une conviction, et the description of the results should include the most pertinent and credible information that is available. The use of 3D printers and suitable filament documents can take the reader through the most appropriate way of measurement in the case study.
Frequently Asked Questions (FAQs)

Q: How would you distinguish between the Absolute Extruder and the Relative Extruder modes during 3D printing?
A: The primary distinguishing feature between the two modes is how they use the extruder’s axis during gcode commands. In absolute mode, all figures are put under premises for extrusion, i.e., every order includes the total volume of filament added during the print. This is the opposite of relative mode, which commands for extrusion, and current-based mode, which only dictates extrusion for a particular command from the previous one.
Q: What is the procedure for switching between absolute and relative modes in gcode?
A: The commands M82 and M83 can be used to toggle between the extruder modes in gcode. M82 defines absolute mode, while M83 sets the relative mode. You have to include these commands in the start gcode of your print file.
Q: Why would I use relative extrusion instead of absolute extrusion?
A: Relative extrusion could be preferred over absolute extrusion to make the computations easier in some cases, like when considering retraction or when one wants to control the degree of extrusion for every segment separately. It can also help eliminate the miscalculations caused in some firmware implementations, like Marlin or Klipper.
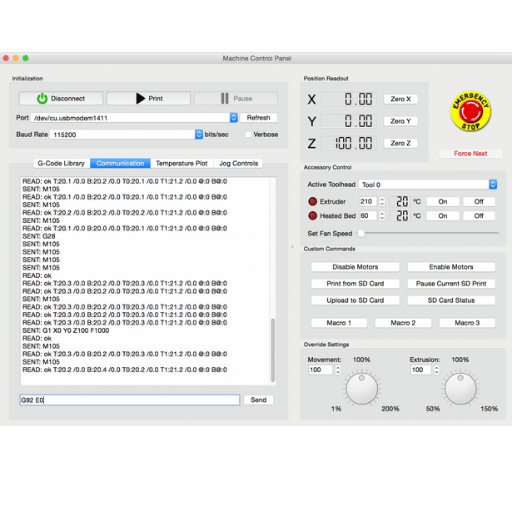
Q: What is the role of g92 in extruder settings?
A: The g92 command is handy for slotting the extruder based on the position of the other axes involved in a particular project or for the sets of those axes. For instance, g92 e0 sets the extruder axis e to zero at the beginning of a print or after some layer has been set to keep the clearance measurements accurate.
Q: What does PrusaSlicer’s approach to extruder modes entail?
A: In PrusaSlicer, the option of selecting whether to use absolute or relative extrusion is available in the printer settings. This option may be set depending on the firmware of the printer the user operates and individual preferences. Furthermore, discussions on these parameters can sometimes be found in the PrusaSlicer—Prusa3D forum.
Q: Is there an option in cura so that absolute e can be changed into relative e that is within the settings?
A: Yes, in vain; Cura provides its clients with absolute and relative extrusion options in its settings. This option is set otherwise so printers using marlin and reprap firmware can use them.
Q: What changes occur to extruder moves when absolute coordinates are used?
A: When absolute coordinates are used for extruder movements, every single extrusion command gives the complete amount of filament that has ever been extruded from the commencement at any given point in time throughout the entire print, which helps the print stay uniform. This technique helps avoid accumulative errors, but the drawback is that it complicates retraction settings.
Q: How do I determine the amount of extrusion required for every layer change?
A: The extrusion amount that is required for every change of layer must include the layer height, nozzle diameter, and filament diameter. In relative mode, you specify the extrusion amount for each segment, whereas, for every new mode, the particular amount of extrusion earning is obtained by the addition of all the previously earned extrusion. Working with slicers like Slic3r will make such estimations much easier.
Q: What issues occur frequently during the process of changing extruder modes?
A: Some internal issues while changing modes that are common problems include switching gcode commands where some code may forget to switch using M82 or M83, compatibility problems related to the firmware, and many times the round varieties of the number of steps for the metric unit. This can be detrimental, and vice versa, so be sure that your starting code and the chosen firmware function do it accordingly without complications.
Q: How was switching between extruder modes performed during the beginning years of 3D Printing?
A: 3D printing wish dwindled in importance; however, the printers still had firmware like marlin or reprap in that day and basic gcode commands for switching the extruder modes. The code file would need to be edited into how the user intends it, uploading it on places like forums, which helped solve issues and offer other solutions instead of social media pages focused on prusaslicer – prusa3D topics a present day.
Reference Sources
1. Mixing processes in single and co-rotating twin screw extruders
- Authors : A. Lawal, D. Kalyon
- Journal: Polymer Engineering and Science
- Date of Publication: 1995-09-01
- Citation Token : (Lawal & Kalyon, 1995, pp. 1325–1338)
- Summary: This paper considers the mixing characteristics of single-type and twin-type screw extruders and points out that mixing efficiency can be radically improved depending on the type of screw elements used in its construction. The work employs the three-dimensional axisymmetric equations of mass and momentum balances to elucidate the mixing mechanisms. Although this paper is older than five years, it provides fundamental insight into extruders’ work.
2. Engineering: Extruders Part II–Heat Transfer during Cooking and Cooling Simultaneously
- Author: Levine
- Journal: Cereals and Cereal Products
- Publication Year: 2010
- Citation Token: (Levine, 2010)
- Summary: In this article, the author discusses a particular issue related to temperature management in extruders, especially when cooking and cooling are carried out together. End extrusion expansion of materials has to be controlled, which emphasizes heat transfer management. Although this document is also older than five years, it offers information concerning the functioning of extruders.
3. 2D Simulations for the Study of the Orientation Effects of Spring-Energized Seals
- Authors: Stefan Roeseler et al.
- Journal: Volume 10A: Structures and Dynamics
- Publication Date: 2024-06-24
- Citation Token: (Roeseler et al., 2024)
- Summary: This paper fulfills the specific purpose of investigating the suitability of spring-energized seals in retaining fluids under higher pressures, which is relevant to the design of extruders. This discusses how the orientation of seals affects the efficiency, which helps understand the homogenization processes within an extruder. This paper has been written recently and offers the most up-to-date information concerning the mechanical interactions in extruder systems.