The experience of a washing machine producing grinding sounds creates both distress and annoyance for users. The appliance makes alarming sounds which lead to worries about possible upcoming equipment failures and interrupts your regular activities. You share this experience with others who want to know what causes the bothersome sound and its possible solutions.
This blog post will assist you in discovering the primary factors that lead washing machines to produce grinding sounds and it will provide you with effective methods to repair the issue. Your process of fixing the machine will benefit from understanding its existing problems which include both broken parts and secret problems. Read on to learn how to diagnose the problem and take effective steps toward a solution, all while ensuring your washing machine remains a reliable household companion.
01
Understanding the Grinding Noise in Your Washing Machine

Cause 01
Faulty Bearings
Over time, bearings help to deteriorate, making the drum spin dust-free. Then, grinding noises can be heard when in operation.
Cause 02
An Object Lodged in the Drum or Pump
Buttons, coins, or other small objects might fall in a drum or pump as well. This has the potential to ensure that frictional noise is produced.
Cause 03
Worn-Out Drive Belt
The drive belt is frayed or broken, leading to congestion and noise whenever the machine is in motion.
Cause 04
Motor or Motor Coupling Fault
Damages caused to the motor or the motor coupling can verily cause grinding noise, especially because it gets up to speed.
What Constitutes a Grinding Noise?
Grinding noises in a washer are often mechanical in origin, and not in a washing machine. This sound will be described as a raucous metallic scratch or even a buzz for some washes, the spin, or the drain. The reason could be a shifting tolerance, wear and tear of the bearings, causal effects due to foreign debris in the drum or on the pump impeller, or a worn/damaged drive belt. The grinding sound can also come from a motor that is faulty or that is not really mounted properly prior to its operability. If you ever hear this grinding noise, it becomes crucial to stop the problem immediately in order to avoid causing more load on the washer washing machines.
Common Symptoms Associated with Grinding Noises
-
Loud Metal Noises
Often, a grinding noise will sound like a harsh metallic sound. This will usually occur especially when entering cycles such as when it spins or draining. -
Nonuniform or Wobbly Motion of the Drum
A visible misalignment or an excessive degree of wobbling in the drum may count as one of the elements adding to the sound. -
Hesitates to Complete the Program
Appliances showing signs of a persistent problem will fail to complete a cycle, especially in the last phases. -
Burning Smell
There may be some overheating of the motor, resulting in a foul burning smell generated by the grinding noise, which the appliance is trying to dispose of. -
Draining
Sometimes one of the problems could be poor drainage resulting in a grinding noise.
It is highly recommended that you troubleshoot any of these symptoms as soon as they are noticed or go call a technician.
When to Be Concerned About Loud Grinding Noises
If your washing machine starts making loud grinding sounds, you need to act promptly so as not to aggravate the existing damage. From the common concerns raised by users and search data, immediate attention needs to be given to a few possible scenarios:
Scenario 01
Noise Sudden
If at all the noise started from grinding more or less suddenly and there was no wear and tear evident, then it is highly probable that some major parts of the machine have malfunctioned — I’m talking about a broken drum bearing or a misfitting motor coupling to prevent drum. Such slight malfunctions generally contribute into absolutely frustrating washing procedures and therefore must be diagnosed immediately.
Scenario 02
Combinations with Symptoms
Grinding sounds together with other symptoms such as occasional drum jumping on a spinning cycle, inability to spin, intense vibrations, etc. tell us that any mechanical problem of uttermost concern needs to be addressed. Take for example a loose drum, or a broken spider arm stretching and tiring other components and making further problems worse.
Scenario 03
Aging of the Machine
Grinding noise started with this older washing machine can be a sign of some parts wear and tear, such as the transmission, drive belt, or pump. The issue can sometimes be resolved by changing components, or in one way or another, a new one may seem more cost-effective.
Scenario 04
Metallic Sounds or Visible Damages
Alarming metal grinding sounds should be dismissed as stuff like some coins or other small metallic items might have taken root inside the drum or filter. Not looking out for this leads to internal damages, and the mechanical beast should be halted and the culprit removed immediately.
Early attention helps prevent further damage and keeps a tap on the repair costs. Ignoring these signs spells doom for the appliance. You can immediately contact a professional technician or see what the company’s (running the show) warranty and support number has to offer for help in the least amount of time.
02
Initial Checks for Your Washing Machine

Ensuring the Washer Is Level
Following these few steps to ensure proper leveling of a washing machine:
- 01
Check the Surface
Set the machine on a stable, plain surface. Slanted or rough surfaces may result in annoying shaking while the machine is running.
- 02
Use Level
Place a bubble level on the top surface of the washing machine in order to check its balance. You need to get the bubble stabilized properly. If not, start adjusting the lower foot for better stability.
- 03
Adjusting Feet
Look out for adjustable feet fitted on the bottom end of the washing machine. Screw it clockwise or counterclockwise to raise or lower each of them till the machine gets flatly overhead.
- 04
Stability Test
Gently push the machine sideways to check whether it is stable and does not rock.
After a proper leveling process, the machine will hardly make noise and minimum vibration, and this is crucial for its internal components in that it helps in cutting down their wear during operation.
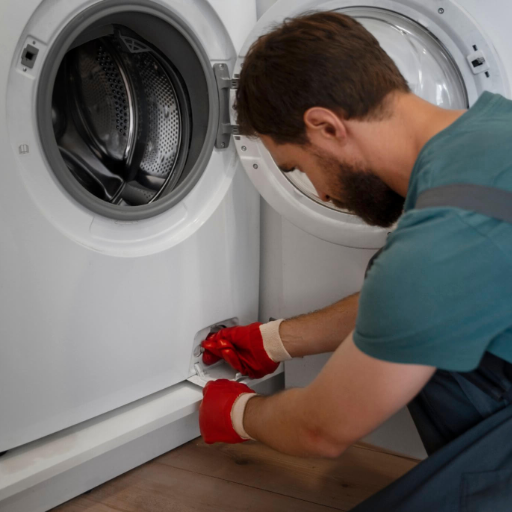
Checking for Foreign Objects in the Drum
When starting up your washing machine, always make sure nothing is left behind in its drum. Such entities as coins, keys, hairpins, or small toys can severely damage the drum, the seals, and sometimes the drainage system, if not taken out. For creating the aforementioned check, rotate the drum very slowly by hand, and examine both the drum inside as well as the rubber gasket that covers the opening.
Failure to check for objects in the drum often flies the flag for washing machine malfunctions and noise. One must get into the habit of rummaging through clothing pockets to make sure that they are devoid of foreign objects being introduced into the drum. By practicing this simple caution, one may eliminate completely unnecessary repairs and extend the life of the washing machine.
Inspecting the Filter for Blockages
If you are looking up on how to control the washing machine, note that keeping the filter clean is a measure to ensure your machine runs efficiently. The filter is usually placed either at the front of the bottom of the machine or under a small door. Its function is catching lint and alien objects and small pieces of things, which at times end up blocking the flow of water into the machine. This may result in blockages, the terrible smell that builds up seriously, or poor machine responsiveness.
To check their filter, the owner should always ensure that the appliance is turned off and disconnected from the power supply, seek out the compartment in the machine, and get a towel or some dish of contact underneath to receive all unwanted debris. The filter compartment needs to be opened; the filter is being pulled out and clean up all debris or lint stuffing the screener. After the mass has been liquidated inside the filter, rinse it under a running stream of warm water before securing it back once more. Can only such conduct help prevent a blockage of aversely caring for the filter through frequent inspections; a consumer should effectually discharge water and longer its useful life too.
03
Diagnosing Specific Issues Causing Grinding Noises
| Component | Key Symptom | How to Identify | DIY or Pro? |
|---|---|---|---|
| Drum Bearings | Grinding / rumbling during wash or spin | Spin drum by hand — noise or play indicates wear | PROFESSIONAL |
| Water Pump | Grinding during drain; poor drainage | Check impeller rotation; inspect for debris or cracks | PRO ADVISED |
| Drive Belt | Rubbing noise; drum not spinning | Inspect for graying, cracks, or slippage off pulley | DIY POSSIBLE |
| Motor Coupling | Clunking or rubbing at speed-up | Turn coupling by hand — check for hang-ups or noise | PRO ADVISED |
Worn-Out Drum Bearings
The bearings supporting the drum are quite crucial to the smooth running of a given washing machine. If, upon its operation, any loud grinding or rumbling noises are heard emanating from the machine, heralding that they are safely wearing down. Some usage after a long period and exposure to water can thus naturally lead to wear and tear, leaving the bearings most affected. Observing some signs such as loud grinding or rumbling noises during wash or spin cycles, allowing the drum bearing to move non-stop and thereby vibrating the drum in his unit, or there might indeed be slight movement in the drum whenever one spins it manually.
Unplug the washing machine to see whether this potential cause of noise can be suspected at all, turn off the water, and then take off the back panel of the machine to inspect the drum bearings inside. The symptoms one should look for are any wear and tear, damage, or rust. Therefore, to do some impromptu test over it, it is simply a matter of spinning the drum by hand. If one realizes that the drum does give slightly or makes a noise while it is being spun, then certainly one knows that the issue must have actually been in the bearings losing their integrity.
Drum bearings that need to be replaced are a very challenging fix. One should consider hiring professional repair technicians once reaching the point in time when it is necessary to do this. Although some people with some basic repair skills might still want to alter their bearings using online guides, they will definitely have problems in figuring out which bearing is a candidate for their particular models. Success in this initiative likewise, may actually hamper the lifetime of your washing machine due to failed attempt at proper bearing selection. If one feels unsure about any aspect of the job, he should leave the room to professional repair technicians.
Faulty Water Pump and Its Effects
A bad water pump is frequently the prime cause of grinding noise in washers while washing clothes. The water pump is the component responsible for ejecting sewer water during the wash and spin cycles. As the pump gets clogged by lint, tiny objects, coins, and other such materials, it will lead to the production of strange grinding sounds. Moreover, mechanical wear on the motor and impeller blades may also fuel the generation of such sounds. Dismissing the issue may also lead to blockage, flooding, or other harm to the machine. It is advised to properly check the pump for shards or debris and, even if nothing there, to have it replaced. There must be a proper diagnosis with repair tools, and professional assistance is recommendable after more instances.
Damaged Drive Belt and Motor Coupling
A faulty drive belt and motor coupling are two factors that cause a washing machine to produce a grinding sound. The drive belt is a linkage that connects the motor to the drum-motor and allows the drum to rotate. As it becomes old, maladjusted, or has cracks in its body, it may slip. Also, the belt may generate sounds caused by rubbing or grinding. The motor-coupling links the motor to the transmission and delivers power. Its weakening, causing damage, can generate clunking or rubbing noise due to its inefficiency at power transfer.
If the machine fails to work properly, start by unplugging the machine and checking the belt. Look for graying, cracks, or any visible damage. If there are, then go to the store immediately and buy a replacement belt. Also, check the motor coupling for any defects caused by vibration or dry lubrication; this may very well be related to a strong misalignment over time. Gently turn the coupling to make sure it turns smoothly, free of hang-ups, and is silent. You can purchase the new within next 30 minutes, whereas you also have the option of letting your good friend lay it in.
Incompatibly, the car still continues to grind badly because the major mechanical equipment, the engine and power train systems, is suffering from wear and tear and needs investigation. Hence, things should from there be referred to a renowned professional for a full overview. A great deal of upkeep on these parts is a significant step to reducing any wear on operation and extending the lifetime of the machine.
04
Step-by-Step Troubleshooting for Repairs

How to Access and Replace Drum Bearings
Replacing the drum bearings in a washing machine requires precision and the right tools, but the task can be done effectively by following these steps:
- 01
Prepare the Machine and Tools
Disconnect the washing machine from the power supply and water hoses. Ensure you have the necessary tools; for example, a screwdriver set, wrench, bearing puller, and drum bearings that fit your machine’s model. Consult the user manual to confirm compatibility.
- 02
Take Out the Drum Assembly
Usually, you will begin by removing the top and back panels of the washing machine using a screwdriver. Detach the drive belt or motor coupling connected to the drum. Please find and separate from the drum assembly any electrical connections or hoses. Very carefully lift the drum assembly out of the machine.
- 03
Take Out Old Bearings
Place the drum assembly on a stable surface. Look for the rear shaft boots of the bearings in the drum. Carefully take out the old bearings with the help of a bearing puller or hammer with a drift. Don’t do any harm to the drum or any surrounding parts at this stage.
- 04
Fit New Bearings
Wipe the dirt or particles off the bearing pocket with a piece of cloth. Gently press them into place using a press or a hammer and gently tap on a soft drift to make sure that they sit snugly into the seating.
- 05
Reassemble the Machine
To put all pieces back together, reverse all processes mentioned above. Install the drive belt, motor coupling, and hoses once again, and ensure that all cables are connected. Fix the top and back covers of the washing machine.
- 06
Check It Thoroughly
Reconnect the appliance to the power supply and inspect for any leaks or odd noises whilst operating any short cycle wash to validate the operation of the new bearings.
If you are looking at a new washing machine, it could be worth considering one with a larger drum size, especially if you feel the need to wash substantially heavy items or large pieces rather than just small loads.
Steps to Diagnose and Fix a Faulty Water Pump
- 01
Unplugging the Washing Machine
Disconnect the washing machine from an electric source in order to avoid the possible risks of electrical shock whilst working on the water pump.
- 02
Shut Off the Water Supply
Switch off the water supply valves to avoid water leakage during the repair process.
- 03
Locate the Water Pump
You have to gain access to the water pump of the washing machine through its back or bottom panels, depending on the design of your machine.
- 04
Inspect for Visible Damage
Examine the water pump for any such damage that makes it less efficient like cracks, blockages, or leakage. Look for any debris stuck in the pump or hoses.
- 05
Test the Pump for Functionality
The pump impeller must be spun by human force to see if it can rotate properly. When the pump impeller gets stuck or is difficult to turn, a water pump failure may be in order.
- 06
Use a Multimeter to Check Electrical Continuity
Check the water pump’s motor with a multimeter and test for continuity. Replace the motor if there is no continuity.
- 07
Replace the Faulty Pump
If the pump is found to be defective, order a replacement unit that will fit your washing machine model, remove the old pump, secure the new pump properly.
- 08
Reattach the Hoses and the Panel
Connect the hose to the new pump and ensure no loose fittings. Replace the washing machine panel and secure it properly.
- 09
Reconnect Power and Water Supply
Plug in the washing machine to the appropriate electrical outlet and turn on the water supply valves.
- 10
Run a Test Cycle
Run a short wash cycle to make sure that the new water pump is working, and look and listen for unusual sounds and leaks during this process.
Repairing or Replacing the Drive Belt
The drive belt is a very important component that is used to allow the motor to the drum and help the drum spin effectively. If your washing machine doesn’t work, then automatically there may be an issue with the drive belt like you can hear the noise or the drum is not spinning. Given below are the steps for you to either fix the belt or replace it:
- 01
Unplug the Machine and the Accessories
To begin with, always pull the power cord out of the power outlet and switch the water supply off to avoid electric accidents.
- 02
Locate the Drive Belt
To locate the drive belt inside the machine, you need to detach and remove the back panel on the unit. Typically, it is a rubber belt linked to both the motor pulley and the drum itself.
- 03
Inspect the Belt
If possible, remove the belt, and inspect it for any visible signs of wearing, cracking, or looseness in the belt. If it has slipped off the pulley, try to put the belt back in place. However, if signs of damage are apparent, it is best to opt for a replacement.
- 04
Replace the Belt
To avoid trouble with the belt before replacing it, carefully push the belt down the pulleys of the washing machine observantly so that you could see how it was positioned. Afterward, slide the new replacement belt around the motor pulley and the drum, ensuring it’s properly aligned and is taut.
- 05
Reassemble and Check
Put the back panel back in place and plug in the machine. Do a quick spin cycle to ensure everything is spinning nicely and your problem is solved.
Following these few concise steps should restore the machine’s full performance to end the inconvenience of an underperforming washing machine.
05
When to Call a Professional Technician
Signs That Indicate a Need for Professional Help
-
Noise Complaints or Vibration
When reduced noise or irregular vibrations become complaints after troubleshooting but persist, there may be something bigger going wrong with the mechanics. -
Leakages
Leaking periods of varying magnitude — from during the washing periods or when the machine is idle — can be indicative of issues with hoses, grommets, seals, or the internal workings. -
Starting a Cycle or Fitting It in Full
For a washing machine not to start at all, not complete a cycle, or not respond to any controls, mainly because of electronic or motor malfunctions, immediately contact a professional to take care of it. -
Used to Emit Smoke or Glow
After smelling a burning scent or observing smoke, cease using the appliances and seek professional help instantly, as such an occurrence might mean a severe electrical or mechanical fault. -
Repeated Error Codes
If an error code appears repeatedly even after a reset, it looks like a symptom of internal malfunction and calls for a technical inquiry.
Risks of DIY Repairs
Attempting to make washer repairs yourself may have detrimental consequences, much to the perfection attempt. Especially done wrong or with cliff notes for expertise as well as the same tools. A major risk is voiding the manufacturer’s warranty, meaning you’ll face paying for expensive repairs or replacement if voided. Handling electrical parts without due care is also highly dangerous, risking shock or even fire. The statistics have reported that many have problems: worsening the problem, breaking fragile parts, or not installing them properly, increasing a repair bill that is exorbitant. While some may consider it an economic choice, DIY is a scary pose in terms of safety and damage to the appliance for the long haul.
Finding a Qualified Appliance Repair Service
In finding a suitable washer repair service, it should be prudent to consider the technical qualification of the technicians for washer repairs. Only take into consideration services that have a very good record as far as customers’ recommendations and reliability are concerned. Ensure that the company is licensed and insured to be able to determine accountability and protection. It is also essential to check out their policies on parts and labor warranties since very few usually give some form of guarantee for their work, in case anything goes wrong. Finally, have cost comparison together with response time, and decide which service provides the best prices which can fix your problem within a good time frame.
Check A
Technical Qualifications
Check B
Licensed & Insured
Check C
Parts & Labor Warranty
Check D
Customer Reviews & Reliability
Check E
Cost & Response Time
06
Reference Sources
-
Repair Technology of Machinery and Equipment: This paper discusses diagnostic techniques and repair processes for machinery, including sound-based diagnostics. Access the study here.
-
Durability Assessment of Products: Analysis and Testing of Washing Machines: This research evaluates the durability of washing machines, including noise monitoring and repair needs during testing cycles. Read the article here.
-
Automating Tool for Fault Analysis of Washing Machines: This thesis explores automated tools for diagnosing faults in washing machines, focusing on sound analysis to differentiate between healthy and faulty machines. Access the thesis here.
-
From Data to Durability: Manufacturer-Agnostic Monitoring to Enhance Washing Machine Repair and Maintenance: This study highlights the use of diagnostic data, including noise patterns, to improve repair and maintenance processes for washing machines. Read the paper here.
- Food Machine and Extruders Provider in China
07