Making homemade breadcrumbs is quite easy, and it can be used to spice up any dish you make. This article will take you through every step, from the start of making breadcrumbs to their multiple uses at various levels in your kitchen. If you want to give a new texture or simply a homemade taste to your dishes, learning the art of making breadcrumbs is one of the most useful skills one could know. We will also look at the equipment needed, starting with a Kitchen Aid and also how to adapt the techniques for professional chefs as well as home cook amateurs. After reading this article you will be able to form a triad of breadcrumbs which you could use with many cuisines you plan to cook.
Why Use a Food Processor for Making Breadcrumbs?

Making bread crumbs with a food processor is very effective as it is effortless to chop the bread into tiny pieces. It helps render uniform grain texture, which is essential for the best possible results when cooking or baking. This instrument enables the alteration of the degree of grain specific to the dish. Moreover, the quick action of the device helps keep the dry texture intact, which is important in improving the taste aspects of the end product.
Advantages of Using a Food Processor
The main benefit of a food processor in the preparation of breadcrumbs is the time saved. It can cut bread much quicker than working it by hand. Research of the Culinary Institute of America states that bread crumbs can be prepared 70% quicker with a food processor which helps the kitchen to run more smoothly. Furthermore, the use of a food processor has the advantage of guaranteeing uniformity in crumbing which is very important for certain cooking techniques especially recipes that have the need for binding or coating ingredients.
Also, as a distinct advantage, the processor can also be used with fresh or dried bread, bringing about savings depending on the ingredients available or the recipe used. Modern food processors come with energy-efficient motors specifically designed to take on various types of bread without getting hot so that the flavor and nutrients of the bread crumbs are retained. Such versatility would be vital for chefs trying to target a particular dish requiring a certain type of texture or flavor. Other than that, data also supports the fact that modern food processors are dependable in maintaining product freshness as almost no oxidation takes place during processing and this improves the flavor and aroma of the bread crumbs in enhancing the various dishes you make.
Steps to Make Bread Crumbs with a Processor
- Preparation of Bread: First of all, choose a kind of bread. Slices of bread which are either fresh or stale can be utilized although wasted bread will always produce better and finer crumbs. Cut the bread into 1 to 2 inch cuts while ensuring that they are not too big for processing.
- Drying the Bread (if necessary): In case you are looking for drier bread crumbs and have fresh bread, you may want to dry the bread pieces in an oven. Preheat the oven at 300 degrees Fahrenheit (150 degrees Celsius) and spread the bread across a sheet. They should be left to bake for around 10 – 15 minutes with constant flipping until they are bone dry but not brown. Wait for the pieces to be cool before you start processing them further.
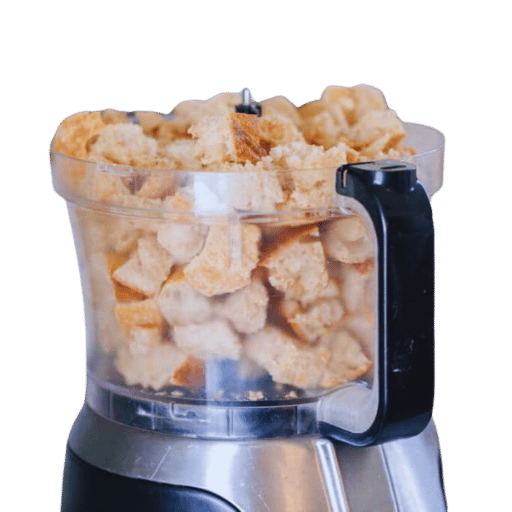
- Processing the Bread: The food processor should now be fitted with the specified standard blade. Put the cubed bread within the processor bowl, ensuring not to exceed the capacity to maintain consistency. Rather than continuously running the processor, use short bursts or ‘pulses’ to get the required level of texture, coarse or fine, desired.
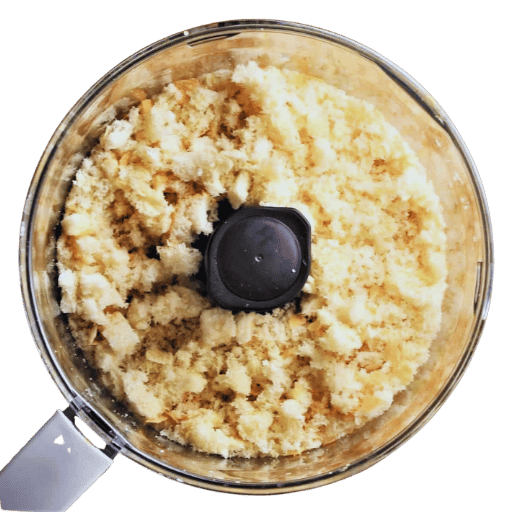
- Inspection and Texture Adjustment: After processing, the crumbs should be checked for any visible large remnants among them and reprocess as necessary. Additional grinding may also be required to obtain the desired finesse of the crumbs.
- Storing the Breadcrumbs: When the breadcrumbs are finished being processed, move them into an airtight container. They can be kept in a cool, dry area for future use within a short period of time, or they can be placed in the freezer for a prolonged period of time with the assurance that their quality will be preserved for future usage.
These best practices simplify the process and point to the advantages of a food processor when preparing breadcrumbs by utilizing instructions available in the best cookbooks.
Choosing the Right Food Processor
Choosing a food processor is never an easy task as it consists of multiple processes that, when undertaken, will affect its performance. One of the factors to note is the motor power a food processor has, which is generally measured in Watts. One can note that the higher the wattage, the more robust the power of the food processor is; hence, the more it can take up larger tasks such as mixing dough or chopping dense vegetables. Another feature or rather characteristic that one should look up to is the capacity of the workbowl. A food processor with a work bowl capacity of 10-14 cups is ideal for larger families; in the long run, it will considerably help those with a busy schedule. In a case in which one has little use and would like to go for small batches, a smaller food processor would do the trick as well. To allow for more versatility, models that have variable speed controls and pulse functions should be in your consideration set. Furthermore while purchasing a food processor look for attachments and blades, premium food processors often have a few components which allow for more slicing, grating and dicing which is essential when cooking. Majorly, these premium components are dishwasher safe, providing the added benefit of being easy to clean. Finally, check for the warranty and warranty offered, as they are usually related to the reliability and durability of the product. Focusing on these dimensions will help you buy a food processor that fits your budget and meets your cooking needs.
How to Make Homemade Breadcrumbs Without Appliances?

Using a Rolling Pin to Make Crumbs
First, breadcrumbs can be made with a rolling pin only, the first step being the bread slices’ drying to reduce their moisture content, which may either be done by simply placing them out for a day or on the lower rack of the oven and changing the setting to high. When the bread is sufficiently dry, he puts it into a plastic bag, which is sealed after pushing air out. The bread slices are then rolled with a rolling pin until the crumb size sought is attained. Finer crumbs are best used for coating, and coarse crumbs for stuffing. This technique is quite simple, does not use any electric power and works very well.
Embracing the Grater Method
The use of a grater for making homemade breadcrumbs can be interesting for those who hate inconsistency in crumb size and shape and don’t want to have unnecessary equipment in the kitchen. First of all, you need to dry your bread slices in an oven set at 250 degrees Fahrenheit or 120 degrees Celsius for 10-15 minutes so as to make them dry and hard instead of brown in color. After the bread has cooled down, you have to apply pressure as you grate the bread against a coarse grater. By this technique, you can control the texture of the crumbs quite precisely, and they will be all cut more or less exactly the same size, which is suitable for coating like panko-style breadcrumbs. One of the best things about the use of a grater is that it is very easy to find one in most kitchens and uses little space for storage. Additionally, grating requires a lot less effort compared to crushing bread by hand which is why most people like to do it.
Without a Food Processor: Best Practices
It is possible to make bread crumbs without a food processor by employing various methods that will yield good results. Start by determining which type of bread to use – there is a global consensus that stale or artisanal bread is most appropriate for the task since it is naturally dense. Preheat the oven temperature to no more than 250°F (120°C) and dry the bread for 10 to 15 minutes to ensure it does not change color, as this would obliterate the intended purpose of the bread. After it cools down, there is a choice between the rolling pin and grater to produce the desired amount of crumbs. As a further step, a mesh sieve can be used to separate the crumbs, and the size of crumbs needed for the dish can be achieved. Last but not least, freshly produced breadcrumbs should always be stored in airtight jars in order to maintain the harvest produced. These techniques utilize common household hardware in order to create high-quality bread much more quickly and with less effort, which is advantageous for both a normal household and a commercial kitchen.
What Type of Bread Works Best for Bread Crumbs?

Fresh vs. Dried Bread
Since fresh bread is softer and retains moisture, it is not the best bread that can be used for breadcrumbs because it can stick together. On the other hand, older bread, especially stale or dried bread, offers a better structure for crumbs as the pieces produced are more uniform. For best results, one should utilize dried bread in the preparation of breadcrumbs: it simplifies the process and gives the best quality of crumbs. Alternatively, it is reported that whole meal or sourdough bread also improves taste and adds value, which ensures a better final product.
Using Stale Bread for Better Texture
Because of the stale bread’s drier properties, it is favored for making breadcrumbs. This is supported by reputable cooking establishments which note that because it is dryer, stale bread does not clump as much during grinding as fresh bread. Its drier texture makes it possible to produce bread crumbs, which are fluffed up, dry, and porous in nature and which can be used for breading or as a sprinkling of dry powder on top of various dishes. Also, while cooking, stale bread is better at soaking the flavors, which enhances the taste of the food immensely. Thus, in producing breadcrumbs, the use of stale bread has benefits in texture as well as in functional variety.
Suitable Bread Pieces for Maximum Flavor
For breadcrumbs to have a greater depth of taste, it is necessary to start with the appropriate kind of bread. It is advisable to use whole-meal and sourdough bread too. Such breads are both flavorful and give nutritional value even after the process of turning them into breadcrumbs. Whole grain breads have an array of textures from the seeds and bread available, which can be quite useful for the dishes. With the special way it is fermented, sour bread gives an acid taste that has a positive influence on the overall taste of your dish. The integration of the newest observations demonstrates that broad and coarse varieties of bread made from multi-cereal or multi-nut continue contributing flavor in addition to texture and mass, which renders the culinary use of the breadcrumbs significantly more advanced.
Can You Make Breadcrumbs by Hand?

Mastering the Art of Fine Breadcrumbs
In order to properly handmake breadcrumbs, the key is to obtain thoroughly dried bread in order to avoid any clumping during the chewing process, rub with a grater or blitz in the food processor for fine uniformity, otherwise all the pieces should be of similar size. For even texture and even cooking, hand crumbling achieves different sizes, shapes and texture which will be appropriate for the specific cooking. It is ideal to pass them through a sieve after making the breadcrumbs so only the fragments and granulars are left.
Tips to Make Crispy Crumbs at Home
- Choose the Best Bread Type: Low-quality, higher carbohydrate-content varieties dry out more efficiently, are easier to crush into crumbs, and provide superior texture. Sourdough and rye are the perfect examples of what to choose.
- The Proper Way of Drying the Bread: Lay the slices flat on an oiled baking sheet. Place in an oven which has already been preheated to a temperature of around 250 degrees (120 degrees Celsius) and simply wait for about 15-20 minutes so that the bread becomes hard, but not burnt in color.
- Crumb Size Consistency: The most important thing is evenness in the crumb size. A food processor is quicker but still not able to offer the same finesse as can be achieved with a grater, if done manually.
- Appropriate Methods of Storage: After preparing the breadcrumbs, preserve the crispiness and freshness by putting them in an airtight container. Store in a dark corner out of sight bases in order to help prevent moisture or excessive humidity which can cause the bread to spoil.
- Adding in the Flavors: Sprinkle over very lightly salt, pepper or dry thyme or rosemary- just a pinch, prior to baking or frying the breadcrumbs. This addition not only improves flavor but adds to the overall appeal of breadcrumbs, enhancing the golden and crispy look.
- Uniform Heat Application: In order to achieve an evenly crisp texture, sprinkle the crumbs on a sheet tray and place in an oven set at 325°F (165°C) for about 15 minutes or until the crumbs have browned lightly. In fact, such mixture should be stirred from time to time to facilitate the toasting process.
- Oil Usage: Prior to toasting, spray a very light mist of olive or canola oil on the bread crumbs. This method helps to make the final product crunchier because the crumbs end with dry and tasty skin.
Implementing such methods guarantees that the bread crumbs made in house have the required crunchiness and good flavor which will compliment every dish that they are used with.
Why a Rolling Pin is Essential
A rolling pin has become a standard kitchen utensil, and for good reason, since it is able to provide an individual with high precision while combining plates. This fact ensures that food is evenly rolled to the required thickness, which is a great plus regardless of the item being prepared, be it baked goods, pastries, or other types of cuisine. Now, we also have rolling pins made of silicone, which are self-explanatory, and even rolling pins that have rings with adjustable thickness. Apart from the latter, it goes without saying that the range of applications for a rolling pin goes beyond simply preparing dough, as it could also be used to even meat by smashing or flattening it. All in all, because of the versatility and usage of rolling pins, they are useful tools for both culinary professionals and enthusiasts alike.
How Do You Properly Store Homemade Breadcrumbs?
Keeping Breadcrumbs in an Airtight Container
The first rule pertaining to the preservation of homemade breadcrumbs on their own, is that they are stored in an airtight container where no moisture or air could penetrate since they tend to become tasteless and spoiled. It is a good idea to get a new and dried container and lid to ensure the bread crumbs are not stale. Preferably the storage container should not be clear in order to minimize the exposure of the bread crumbs to inshore light that could easily damage them with the lapse of time. For enhanced shelf stability, it might even be worth keeping the unopened container in a cold and dry atmosphere or even refrigerating or freezing the crumbs while stored in the container. This storage methodology, which has been in practice for quite some time now, appears to be most suited for preserving the texture and the crispy taste of your bread crumbs.
Effective Ways of Storing Breadcrumbs
In order to avoid the risk of spoilage and unpleasant taste, it is essential for homemade breadcrumbs to be properly stored. Recent research proposes that when breadcrumbs are kept in a cold environment, for instance, a fridge, their overall lifespan can improve by 3 months. Storing such food items in a Ziploc bag, which is heavy-duty, would be ideal as it will enhance their usability and prevent moisture from hampering their taste. These crumbs will easily last up to 6 months. When dealing with large amounts of food, ambient temperature must be considered, as the container might get condensation due to temperature inconsistency. Considerable amounts of data show that a temperature between 33°F to 40°F (0.6°C to 4.4°C) is suitable, whereas a freezer has to maintain 0°F (-18°C) to preserve breadcrumbs. These precautions do make sure that the original taste and quality is retained while preserving it as they are later quite useful and are utilized in certain dishes.
Extending Shelf Life with Proper Storage
First, regarding the question of how breadcrumbs can be preserved with storage, a few recent steps or measures discovered through research must be elaborated upon. It is true that refrigeration does limit the growth of bacteria and decreases the absorption of moisture, thus saving the breadcrumbs for a period of 3 months. Also, sealing them in thick freezer bags still remains among the more trustworthy approaches such that they can last up to six months. To these methods, (both these methods) temperature consistency is a sine qua non; one study emphasizes that temperatures in refrigerators must be in the range of 33°F to 40°F (0.6°C to 4.4°C) to prevent spoilage. Where freezing is concerned, the temperature must be 0°F (-18°C) or thereabouts. All of these recommendations are scientifically substantiated so that the life span and active use of the breadcrumbs as an ingredient are enhanced which further augments their rank in the classification of kitchen items.
Frequently Asked Questions (FAQs)
A: In order to make fresh breadcrumbs using a blender at home, start by taking slices of slightly hard bread and use your hands to shred them into smaller portions. Add these to the blender and wait for this mixture to pulse till the crumbs are of a desired form.
A: To prepare breadcrumbs using stale bread, all you need to do is dry slightly the stale bread which is tough. Cut the loaf into bits and put it on a food processor or blender and pulse the cut until the bits are all finely cut.
Q: Can a bread grinder be used to make bread crumbs at home?
A: Yes a bread grinder will help you make homemade bread crumbs. First break the slices into bits, and out these into the grinder, allowing the bread to get to its finely ground state.
Q: What should I do if I wish to make crumbs and am in possession of no food processor?
A: In case you are interested in making bread crumbs without a food processor, then mix the ingredients in a blender. Or you can fill in a ziplock bag with pieces of the bread, rolling a pin over for chunks.
A: It is possible to prepare breadcrumbs with both fresh and dried bread. Fresh bread can be used to prepare breadcrumbs since it is still moist. But if you are preparing dried breadcrumbs, the bread has to be crusted first before making breadcrumbs.
A: Yes, there is a difference. Panko is a type of breadcrumb which can be referred as flakier and light as compared to the bread crumbs which are quite commonly used.
A: Yes, frozen bread can be used to make breadcrumbs as well. Bread should be slightly warmed up before being taken in pieces and used in a blender or food processor.
A: A few pieces of stale bread should be made into small chunks and then placed in a blender until the mixture is smooth. They assist in retaining moisture within the meatballs.
Q: In your opinion what kind of bread would you recommend in making bread crumbs?
A: When it comes to bread crumbs, white bread is most preferred because of its bland flavor and mild softness, making it easy to dry and grind into crumbs.
Q: What is the best storage for fresh bread crumbs prepared at home?
A: Homemade bread crumbs can ben stored in an air-tight container at room temperature for about a week, or in a freezer if they need to be stored for further periods. This ensures packed rottens are made to assist notice the smell and availability of the crumbs.
Reference Sources
1. Modification of Sweet Bread Properties with Diacetyl Tartaric Acid Ester of Monoglyceride (DATEM)
- Authors: Yoga Pratama et al.
- Published: June 13, 2024
- Journal: Journal of Applied Food Technology
- Key Findings: This study examines the impact of DATEM on sweet bread moisture content, loaf volume expansion as well as porosity. The research employed a Completely Randomized Design (CRD) where DATEM was added in various amounts (0%, 0.15%, 0.3%, 0.45%, and 0.6% w/w of total flour), and the data was analyzed through ANOVA. It was established that the bread dough when mixed with higher proportions of DATEM, had better physical and organoleptic properties of sweet bread, which may imply the probable enhancement in the quality of bread made from the crumbs of such sweet bread (Pratama et al., 2024).
2. Employing Comparative Analysis of Commercially Modified Celluloses as Additives in Bread
- Authors: M. J. Correa, C. Ferrero
- Published: January 21, 2015 (not within the last 5 years but relevant)
- Journal: International Journal of Food Properties
- Key Findings: This study analyzed the effects of various commercially modified celluloses on some quality attributes of the bread and their possible effects in retarding bread staling. It was revealed in the study that breads that contained carboxymethyl cellulose and hydroxypropylmethylcellulose had significant improvement in quality, with softer crumbs having great texture and other desirable characteristics. Substantial evidence is provided that the type of bread additives influences the quality of bread crumbs (Correa & Ferrero, 2015, pp. 849–861).
3. Functional bread within a circular economy: The case of using brewers’ spent grain
- Authors: A. Baiano et al.
- Published: February 01, 2023
- Journal: Foods
- Key Findings: This research examined the use of brewers’ spent grain (BSG) in the production of bread as a functional ingredient. The effects of BSG on the texture and palatability as well as the overall quality of the bread was established. The BSG can add nutritional value to bread and this can o the crumbs quality of such bread , which are its by-products(Baiano et al., 2023).